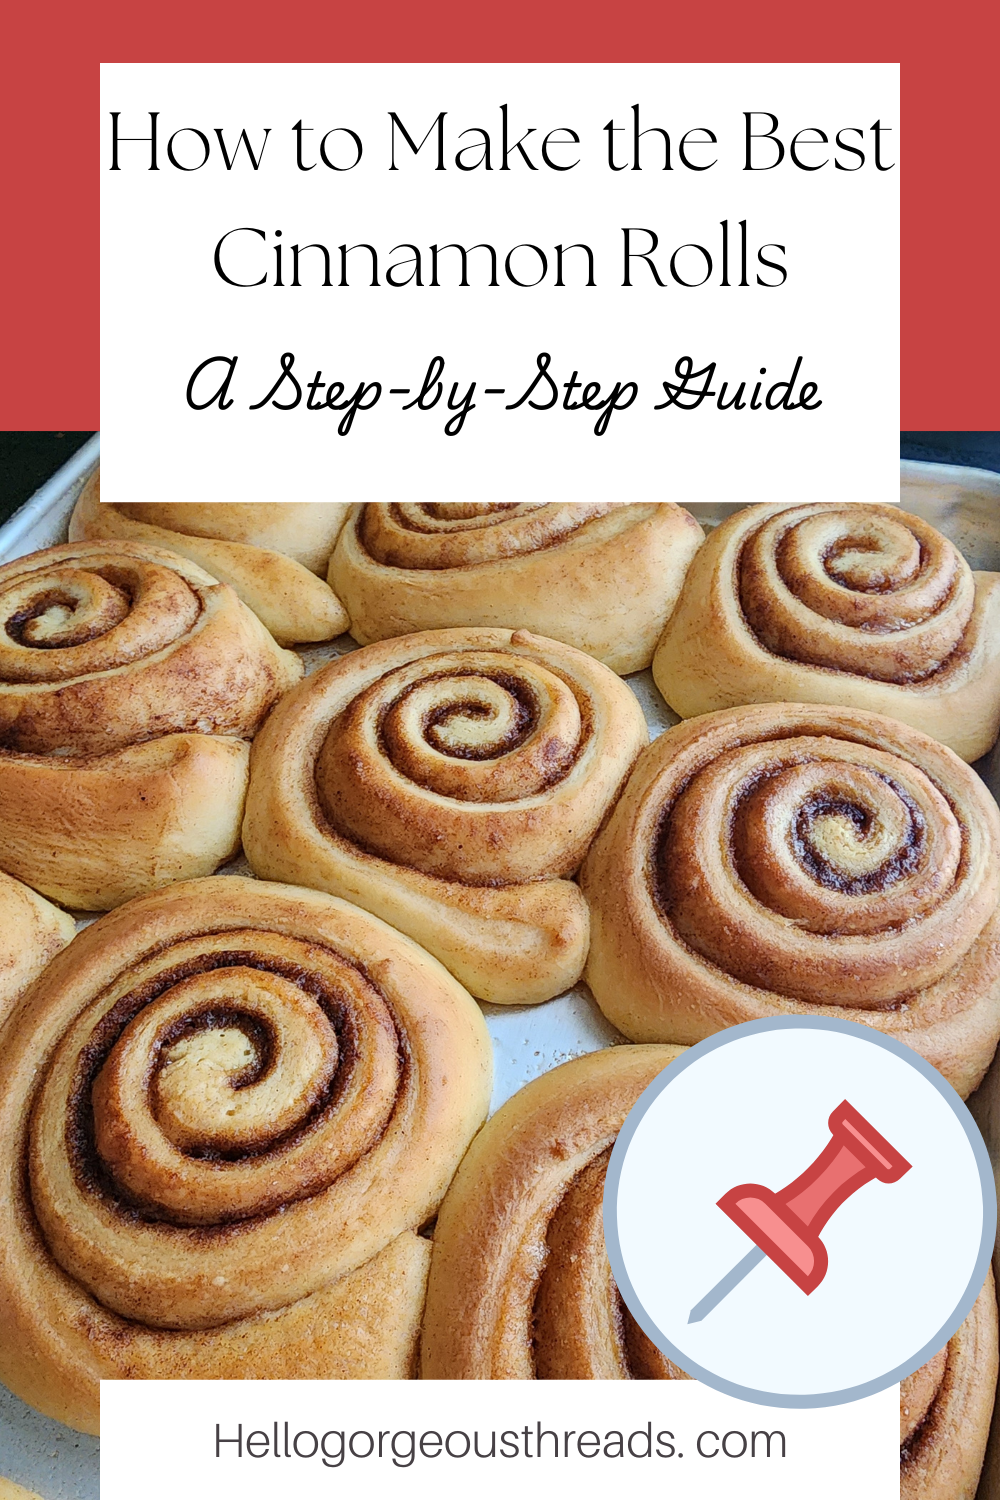
The Fluffiest Homemade Cinnamon Rolls – Soft, Buttery, & Irresistible

Ingredients
For the Dough:
1 cup (240ml) whole milk, warmed to about 100°F (38°C)
2 tablespoons (from 2/3 cup total) granulated sugar
1 ½ tablespoons (14g) active dry or instant yeast (2 standard packets)
½ cup (8 tbsp; 113g) unsalted butter, softened and cut into four pieces
2 large eggs, at room temperature
4 ½ cups (563g) all-purpose or bread flour (spooned & leveled), plus extra if needed
½ teaspoon salt (added with the third cup of flour)
¼ teaspoon cream of tartar (added with the third cup of flour)
1 tablespoon unsalted butter (for greasing the baking sheet)
For the Filling:
½ cup (8 tbsp; 113g) unsalted butter, softened
⅔ cup (135g) packed light or dark brown sugar
1 ½ tablespoons ground cinnamon
Instructions
Prepare the Dough:
In a large mixing bowl or the bowl of a stand mixer fitted with a dough hook, whisk together the warm milk, 2 tablespoons of sugar, and the yeast. Cover and let it sit for about 5 minutes until foamy.
Add the remaining sugar, softened butter, and eggs. Mix on medium speed until combined. The butter may stay in small pieces, which is normal. Reduce the speed to low and gradually add the flour, one cup at a time. After adding the second cup, mix in the salt and cream of tartar with the third cup of flour. Continue adding the remaining flour, making sure each addition is fully incorporated before adding the next. Scrape down the bowl as needed. Once all the flour is added, mix until the dough comes together and pulls away from the sides of the bowl. The dough will be soft but manageable.
Knead the Dough:
Knead the dough in the mixer (switch to the dough hook if using a paddle) for 5 minutes or knead by hand on a lightly floured surface for double amount of time. If the dough is too sticky, sprinkle in a teaspoon of flour at a time, but avoid over-flouring to keep the dough soft.
To check if the dough is ready, poke it with a finger—if it slowly springs back, it’s good to go. You can also perform the windowpane test by stretching a small piece of dough until thin. If light passes through without tearing, it's kneaded enough.
First Rise:
Lightly grease a large bowl with butter. Place the dough in the bowl, turning it to coat in butter. Cover with plastic wrap, a clean towel, or foil, and let it rise in a warm place for about 2 hours until doubled in size. If it is warm outside, let it sit outside in the sun. If inside you can place by the window in the sun or warm in the oven. Proof temp is about 120F. Prepare the Baking Sheet:
Generously butter a large baking sheet to prevent sticking and add extra richness to the rolls.
Roll Out the Dough:
Punch down the risen dough to release air. On a lightly floured surface, roll it into a 12×18-inch rectangle. If the dough resists and shrinks back, cover it lightly and let it rest for 10 minutes to relax the gluten before rolling again.
Fill & Shape the Rolls:
Spread the softened butter evenly over the dough. In a small bowl, mix the brown sugar and cinnamon, then sprinkle the mixture evenly over the buttered surface.
Starting from the long edge, roll the dough tightly into an 18-inch log. If any filling spills out, sprinkle it on top.
Cut the Rolls with Floss:
To get clean, even slices without squishing the dough, use plain (unflavored) dental floss or a thin string. Measure and mark 12 rolls by lightly pressing the floss into the dough to make indentations where you’ll cut.
To slice:
Slide the floss under the dough log, positioning it at the first marked indentation.
Cross the ends of the floss over the top of the dough and pull in opposite directions to slice through cleanly.
Repeat for each section until you have 12 rolls.
Arrange the rolls on the buttered baking sheet, leaving some space between them for expansion.
Second Rise:
Cover the rolls tightly and let them rise until puffy, about 1 hour. I usually put them in the oven with the light on.
Bake:
Preheat the oven to 350°F (177°C). Bake for 25–28 minutes. The rolls are ready when golden brown on top and 190℉
Let them cool on the baking sheet for 10 minutes before adding icing.
Everything You Need to Make Homemade Cinnamon Rolls
(Click each item to shop your favorites—add your own affiliate links!)
1. Stand Mixer with Dough Hook
For easy mixing and kneading. A must-have for any serious baker.
👉 [Stand Mixer – LINK]
2. Large Mixing Bowl
If mixing by hand, you’ll need a sturdy bowl that won’t slide around.
👉 [Mixing Bowl – LINK]
3. Wooden Spoon or Silicone Spatula
Perfect for mixing when you’re not using a stand mixer.
👉 [Wooden Spoon – LINK]
👉 [Silicone Spatula – LINK]
4. Measuring Cups and Spoons
Accurate measuring makes all the difference in baking.
👉 [Measuring Cups – LINK]
👉 [Measuring Spoons – LINK]
5. Kitchen Scale (optional but helpful)
Ideal for measuring flour and sugar by weight.
👉 [Kitchen Scale – LINK]
6. Whisk
For activating the yeast with warm milk and sugar.
👉 [Whisk – LINK]
7. Rolling Pin
Essential for rolling the dough into a smooth, even rectangle.
👉 [Rolling Pin – LINK]
8. Plain Dental Floss or Kitchen Twine
The BEST way to slice cinnamon rolls without flattening them. I mark each roll with an indention first.
👉 [Plain Floss – LINK]
👉 [Kitchen Twine – LINK]
9. Baking Sheet or 9x13 Baking Dish
I prefer a buttered baking sheet for a rich, golden crust.
👉 [Baking Sheet – LINK]
👉 [9x13 Glass Dish – LINK]
10. Parchment Paper (optional)
For easy cleanup and lifting rolls out of the pan.
👉 [Parchment Paper – LINK]
11. Pastry Brush
To brush melted butter across the bottom of the pan and over the rolls before baking.
👉 [Pastry Brush – LINK]
12. Cooling Rack
Helps rolls cool evenly without getting soggy bottoms.
👉 [Cooling Rack – LINK]
13. Clean Kitchen Towel or Plastic Wrap
To cover the dough while it rises.
👉 [Kitchen Towels – LINK]
👉 [Plastic Wrap – LINK]
📌 Love this recipe? Don’t forget to save it for later!

Related Posts


More You May Like


Welcome to my cozy corner of the internet! I’m Brooke, and I’m so thrilled you’re here. As a homeschool mom and a lover of all things Cottagecore, I’ve built a life that’s all about creating warmth, charm, and simplicity—and I can’t wait to share it with you!
Cottagecore, for me, is about slowing down and embracing the beauty of intentional living—finding joy in baking fresh bread, tending a garden, or savoring a quiet moment with a cup of tea by a sunny window. It’s about blending the rustic charm of Cottagecore with the refined elegance of French Country style to create a life that feels both beautiful and attainable.
One of my greatest passions is curating unique, timeless treasures that reflect this way of life. Whether it’s a vintage find, a sustainable piece, or a handmade item with a story to tell, I love sharing these special discoveries with you. And now, you can shop these carefully chosen pieces right here! Each item is selected with love, bringing charm, sustainability, and elegance into your home and wardrobe.
This little community of like-minded women makes everything even sweeter. I’m so excited to connect, inspire, and celebrate the magic of Cottagecore together. Thank you for stopping by—it means the world to me. Let’s embrace a simpler, more beautiful life, one lovely find at a time!
There's nothing like the taste of fresh, homemade buns straight from your own oven. These soft, golden beauties are made with real ingredients and old-fashioned methods for a bun that beats anything store-bought.